Bathroom
A shower sits full of water before it gets a floor
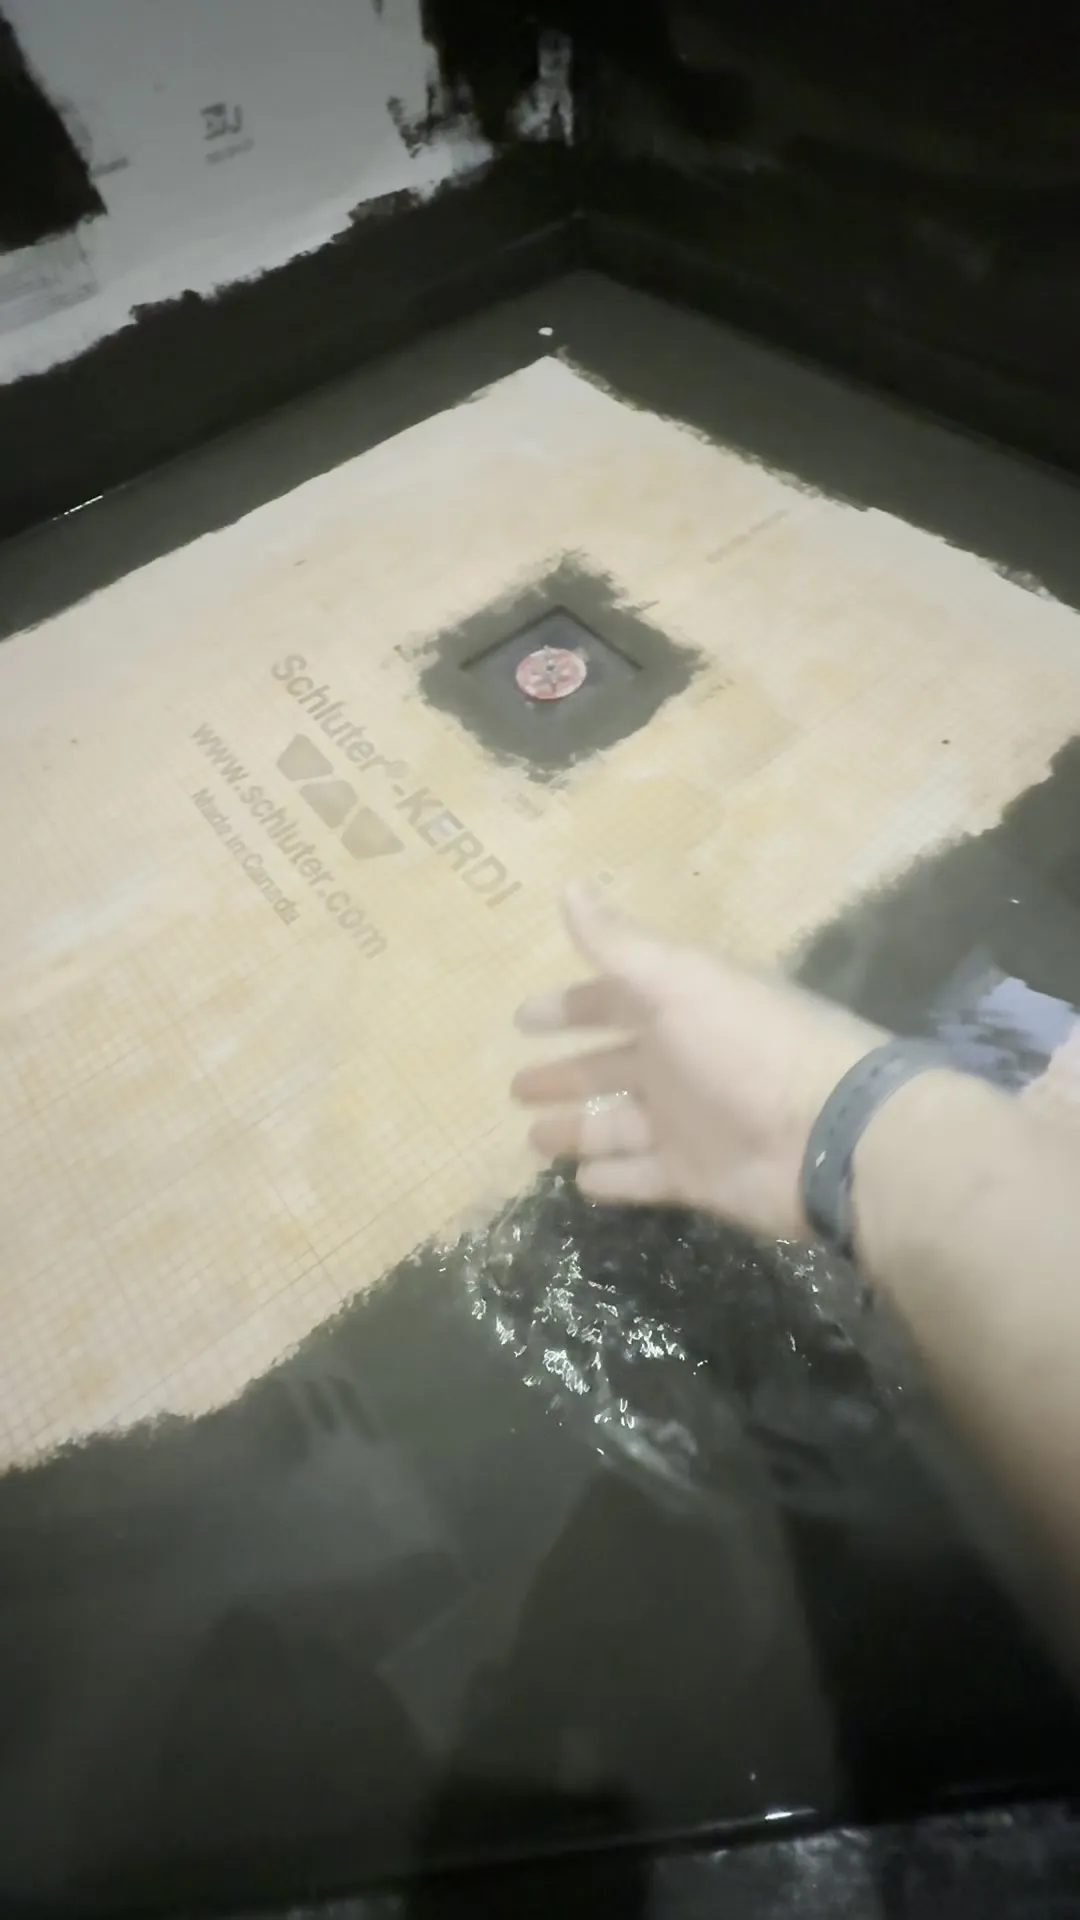
The pan is waterproofed, filled with water and left until the crew comes back to check it. After that the floor goes in — measured first with a template built in the pan itself.
4 min read
On four different showers this crew has filmed, the same thing happens once the pan is built and the waterproofing is on. The drain sits in the middle of a surface that looks ready for tile. And instead of tiling it, they fill it with water and leave.
On one of them it took a second five-gallon bucket to fill it — roughly eight gallons, by the crew's count — and the walkthrough ends with the water in and a plan to come back the next day.
What a pass looks like
The test is simple. Mark where the water sits, leave it, come back. On a Cibolo job the pan was filled on a weekend visit and marked in pencil where the water sat; when the crew returned, the marks were where the water still was. The verdict on that walkthrough: it held up, no leaks, and the plug was coming out.
On a Schertz tub-to-shower conversion the same check closed out a leak test the crew had set up earlier: marks still there, then the water was let out through the drain. And on another Schertz bathroom the pan was being left full over the weekend while fresh wall texture dried, the crew remarking that a dehumidifier running in the room rather defeats its purpose with a shower full of water in it.
The floor is what waits
On all four jobs the pan was tested with nothing on it — no floor tile in it at all. On the three where the floor going in was filmed, it went in after the test had passed. Nobody on these walkthroughs stops to explain the order. It is simply what they do, and it is a part of a shower a homeowner would not otherwise see.
It is not the whole job that waits, either. In the footage of the job with the eight gallons, the wall tile above the pan was already going up when the water went in. On that job the walls carried on while the floor waited.
The floor gets measured with a template
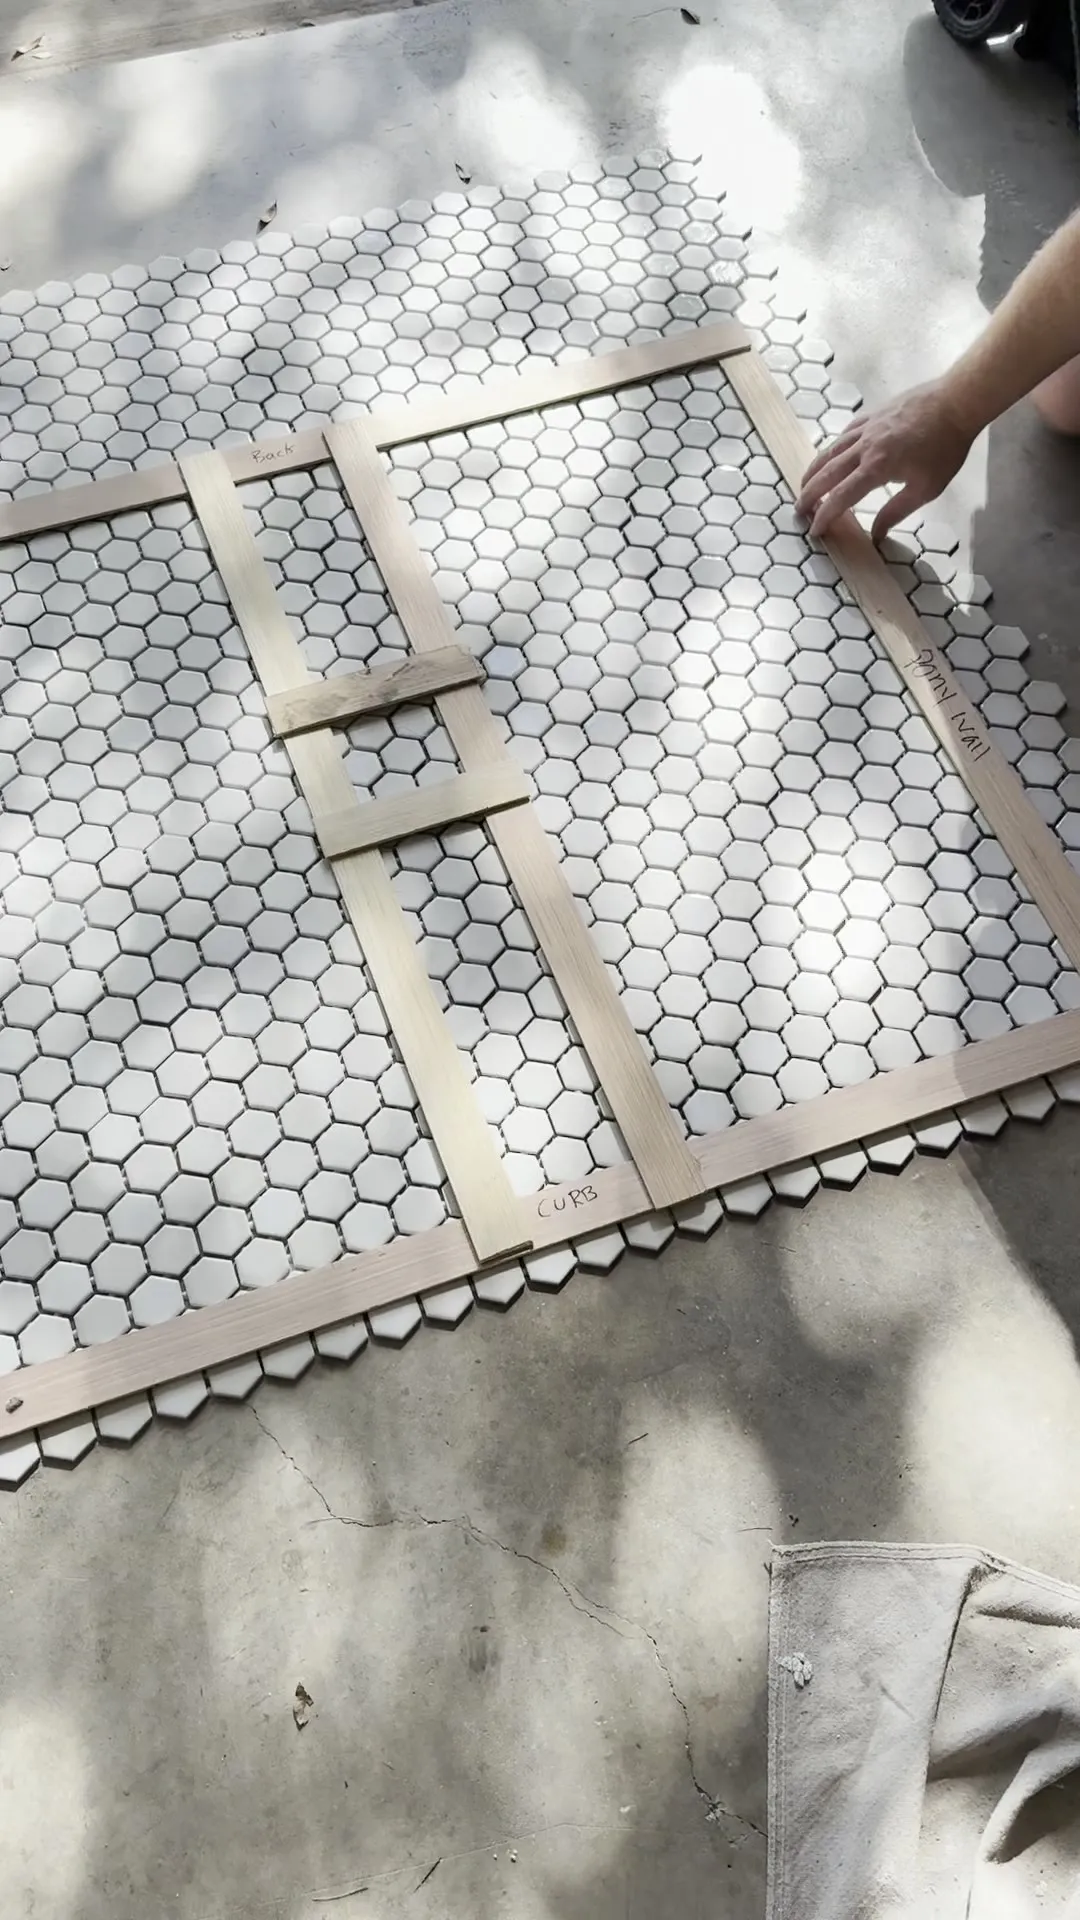
Here is the part that surprises people. Once the test has passed, the crew does not start setting mosaic in the pan. They build a template first — in the crew's words, to get the dimensions of the floor.
Thin wooden strips — furring strips, the crew's “fur-out strips” — are laid around the inside of the pan and glued to one another. On the Cibolo job that was hot glue at the corners. On the Schertz conversion the crew worked from the far side with a little dab of glue at a time, and let it dry before lifting the frame out. The sides get labelled with where they belong.
Now that we passed our leak test, we're using these strips, these fur-out strips, to create a template.
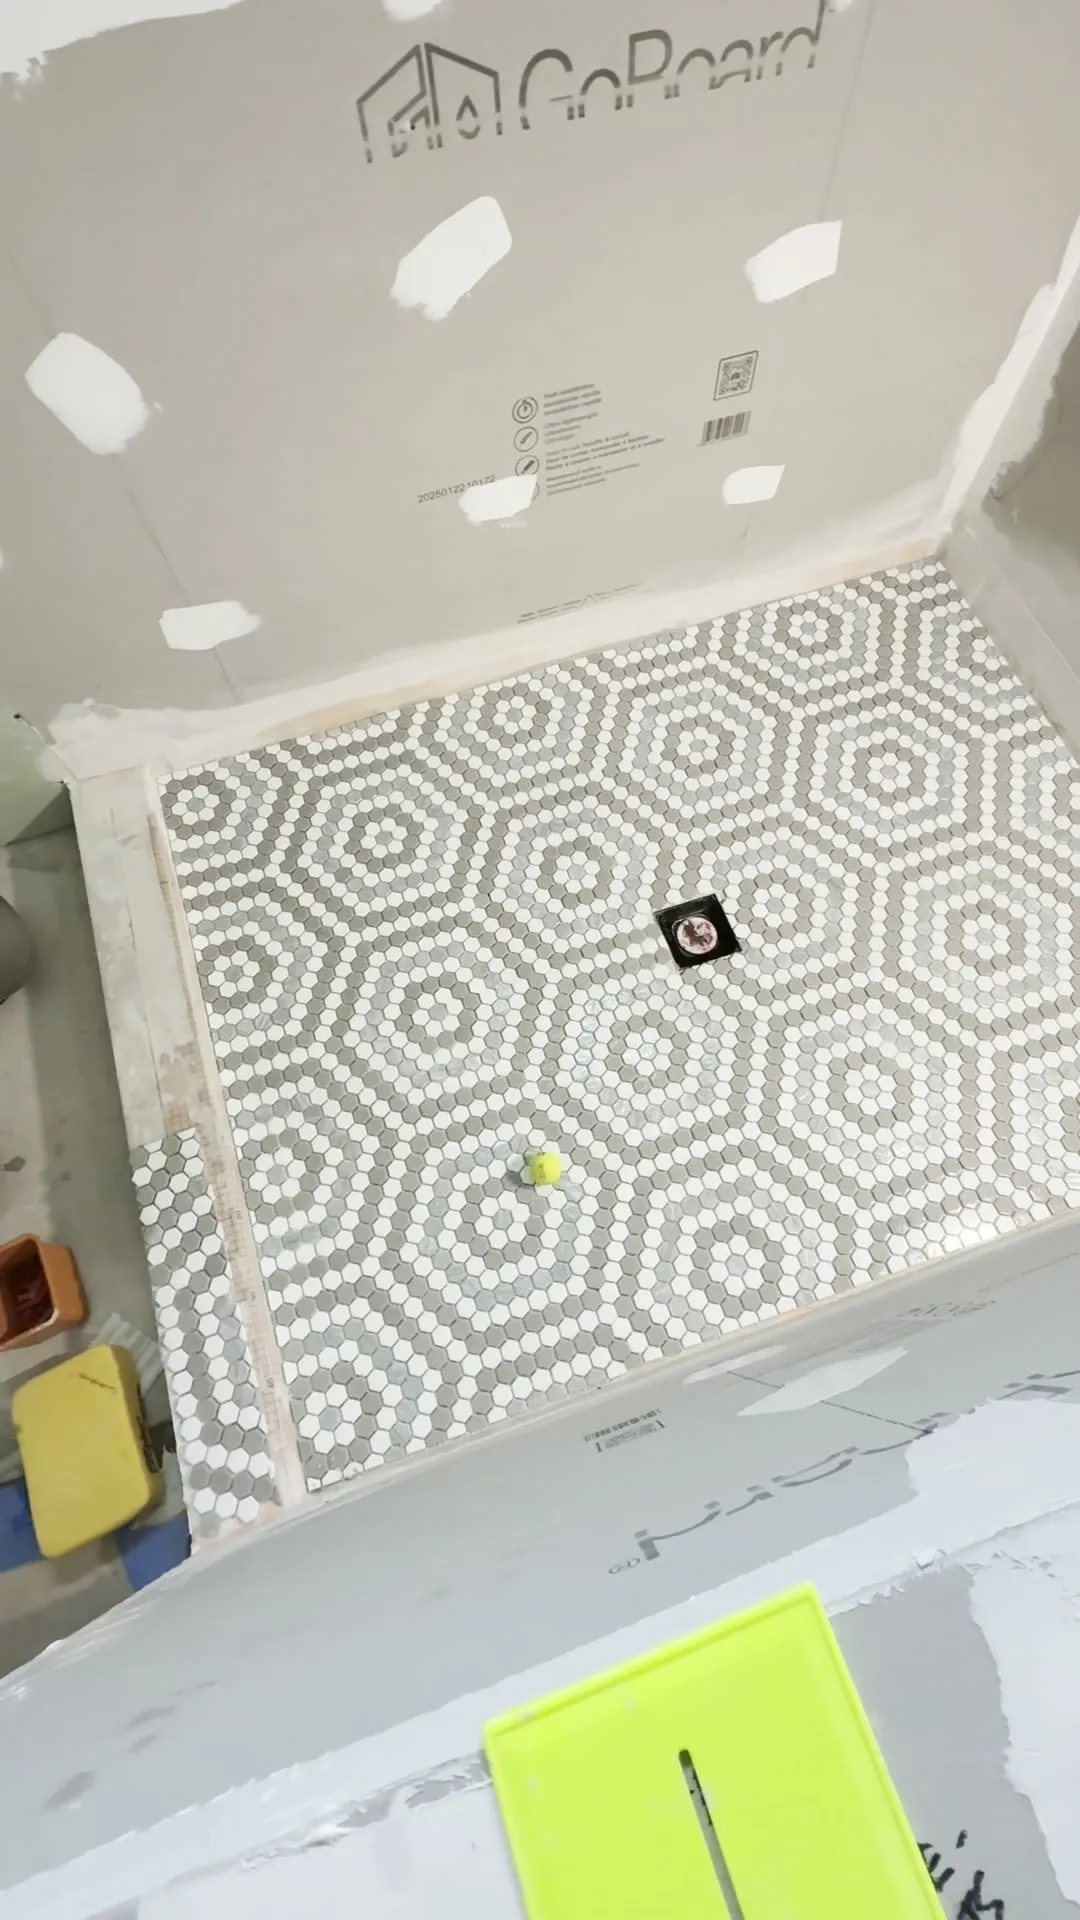
Then the frame comes out and goes down on top of the mosaic sheets, laid flat outside the shower. With the template on the tile, the crew checks that the reveals — their word for the margins at the edges — come out the same all the way round, and marks the pieces that have to be cut around the drain. Then they go and cut.
Sheets back in the pan
The mosaic goes back in as sheets. In the footage from the job with the eight gallons, the sheets are numbered and set along the back wall, the centre of the pan still bare.
Then it gets checked. On the Schertz conversion the last look was a level laid on the curb and the pitch checked on that side — in the crew's words, “perfect level there, same pitch on this side.”
What comes after
With the floor down, the rest of the sequence can close up behind it. On the job with the eight gallons, a Friday walkthrough ends with the wall tile done, the bottom rows set along with the curb and the pony wall, the glass installer on his way to take measurements, and grout planned for Monday.
What to ask
If you are having a shower built, two questions come out of this. Was the pan flood-tested before the floor went in, and how long did it sit? And how was the floor measured and cut before it went in?
Neither is a trick question. Neither leaves much trace once the grout is in, and a crew that does them will not mind being asked.